Ultimate-Resourcepack-Docs
Creating a Resourcepack
Index
- Creating a Resourcepack
Resources
Raw JSON text format, Minecraft.wiki
Formatting Codes, Minecraft.wiki
List of Unicode Characters, Wikipedia.org
Welcome
Welcome to the Ultimate Resourcepack documentation! Everything from changing basic textures to PBR in shaderpacks and advanced animations will be presented here.
This was created by Etomic on Youtube.
Resourcepack
Creating Resourcepack Folder
A resourcepack can either be contained within a .zip file or a standard folder. As a resourcepack is being created, it can simply be a folder in the resourcepacks folder under .minecraft. You can also have access this folder by simply pressing Open Pack Folder in minecraft from the resourcepack selection screen:

Now create a folder and name it whatever you want.
Folder Name Formatting
Whatever we call the folder or zip file will translate to the name of the resourcepack in the game itself within the resourcepack selection menu. The name of the resourcepack folder can also contain unicode unicode escape characters or the § character that I can’t pronounce.
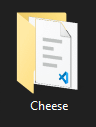
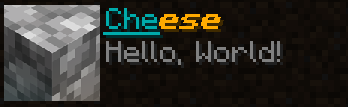
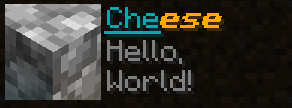
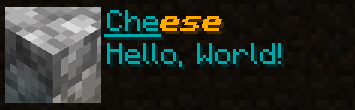
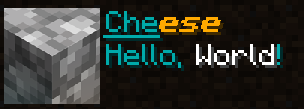
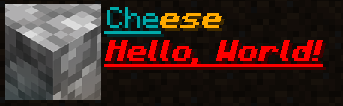
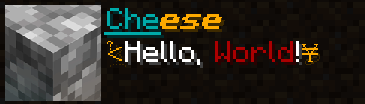
Currently I have called the resourcepack folder to just be "Cheese". As such the folder is displayed as "Cheese".
Windows:
Minecraft:

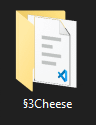
Including the § in the folder name, you can define what colours and styles the title of the resourcepack has.
Windows:
Minecraft:

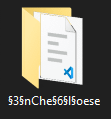
Alternatively you can add multiple §. You can even combine them:
Windows:
Minecraft:

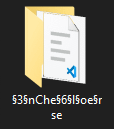
The §r allows you to completely reset the colours and styles that come after it’s declaration, which allows you to redefine what you want without inheriting the styles previously used for what you don’t want.
Windows:
Minecraft:

You can see that the last to characters in “Cheese”, “se” has been reset to the default values. Though you can see that the folder name in windows has become unreadable, but it looks good in minecraft.
Here is a table containing all § codes and unicode escape characters:
§ Code |
Unicode | Colour |
|---|---|---|
| §0 | \u00a70 | black |
| §1 | \u00a71 | dark_blue |
| §2 | \u00a72 | dark_green |
| §3 | \u00a73 | dark_aqua |
| §4 | \u00a74 | dark_red |
| §5 | \u00a75 | dark_purple |
| §6 | \u00a76 | gold |
| §7 | \u00a77 | gray |
| §8 | \u00a78 | dark_gray |
| §9 | \u00a79 | blue |
| §a | \u00a7a | green |
| §b | \u00a7b | aqua |
| §c | \u00a7c | red |
| §d | \u00a7d | light_purple |
| §e | \u00a7e | yellow |
| §f | \u00a7f | white |
§ Code |
Unicode | Style |
|---|---|---|
| §k | \u00a7k | obfuscated |
| §l | \u00a7l | bold |
| §m | \u00a7m | strikethrough |
| §n | \u00a7n | underlined |
| §o | \u00a7o | italic |
| §r | \u00a7r | reset |
The \u00 is a unicode escape character. It cannot be used in the title of the resourcepack as windows does not allow the use of the backslash character \. Though you can still use §.
Minecraft Resources
Creating a resourcepack from scratch requires knowledge of knowing where each and every folder resides. Instead of constantly googling around, why not we ask Minecraft itself.
All the models and textures and literally every visual asset that Minecraft uses is stored inside a jar file that Minecraft uses as it’s source of resources to load when you play the game. What we are going to do, is extract the resources and look inside the clockwork of how the game stores and uses all of the data.
To do this, if your using Minecraft’s default launcher, you can simply launch the game, then go to the resourcepack selection menu. Then simply press Open Pack Folder.
Once you are in the folder, you can go backwards and into the .minecraft folder. There you can see many important folders like resourcepacks, which was the folder you were just in, and saves, which is where all of your minecraft worlds are stored. Now you should know already how to get here regardless, but this time we are going into the versions folder that is inside .minecraft.
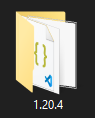
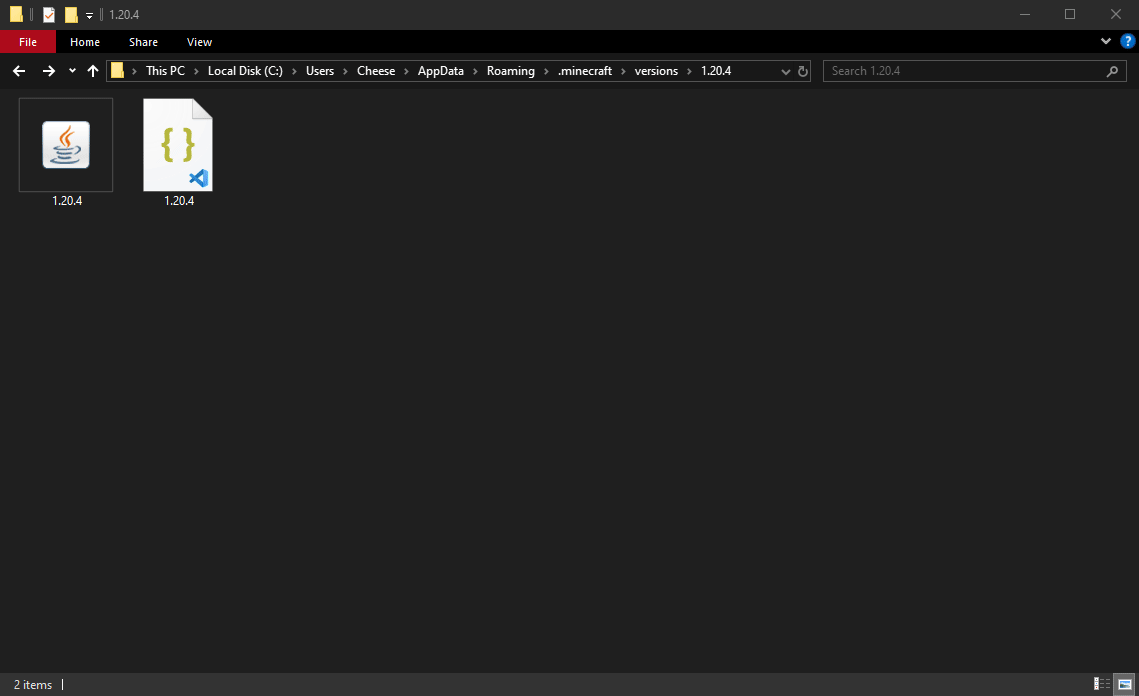
If you have played multiple versions of Minecraft, you should see many folders containing the names of the versions of Minecraft. If you are making a resourcepack for Minecraft 1.20.4, you can go to the folder 1.20.4, and open it up, given that you have played on that version before.
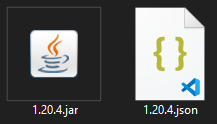
Inside you should see two files. 1.20.4.jar and 1.20.4.json. Our attention is focused on 1.20.4.jar, as it contains all of the information we need.
If you are unable to see the file extensions on Windows, simply click the drop down button in your Windows Explorer, go to View, press Options, go to View, then scroll down and disable Hide extensions for known file types, then click apply.
 {#unhiding-file-name-extentions}
Now that we can see the file name extensions, we know which one of the files is the .jar. Of course if you have Java installed you would see the file type through the icon in my case, but you can never be too sure.
The next step is to extract the jar file as if we were extracting any other compressed archive. The software that I typically use for this kind of thing is 7-Zip, which I prefer over other softwares like WinZip. Simply go to the download page of 7-Zip and install it.
Once you have 7-Zip, you can go to the .jar, right click, go to the 7-Zip section, then press extract files.

Now that we have the .jar file extracted, we can open it up and go to the assets folder.
Inside that folder is .minecraft, and now you can see all of the folders that contain the original assets used within the game. This will be useful when we need to reference what file goes where or if we need to copy a file over and modify it in our own resourcepack.
Json in Minecraft
Json is an acronym for “JavaScript Object Notation”. It is often used for storing and transporting information and data from the programming language JavaScript. Json in itself is primarily used for websites, as JavaScript is usually paired with HTML and CSS.
Minecraft uses Json to store information about object and entity models and any other important information either in raw .json files or .mcmeta files. In this case in a later chapter uses Json to modify the description of the resourcepack and define what version of Minecraft the resourcepack functions on.
Json in Minecraft Syntax
As resourcepacks are indeed an artistic venture, you are often presented with programming in Json depending on your situation. In order to make sure that you don’t have to run around the internet searching for tutorials, I will display how to write in Json specifically for Minecraft right here.
Objects in Json
All data and information stored in Json resides in objects {}. Some objects {} has a defined name. First we create the main object {}, which is simply an empty set of curly brackets.
{

}
Keys in Json
Objects {} contain information called "keys":. A "key": is a "string" that contains a value. In this case, the "key": "Cheese" contains number 5.
{
    "Cheese": 5
}
We define "keys": names by putting them in quotations "", and then a colon : to define what the "key": contains.
Nested Keys
In some cases, "keys": can contain objects {} that contain more "keys".
{
    "Cheese": {
        "Cheddar": 5
    }
}
Here Cheese opens up to another object {} and in there the Cheese "key": is now able to contain other "keys":.
Sequential Keys and Objects
To have a key contain multiple keys, you must put a comma , at the end of every defined key after the value.
{
    "Cheese": 1,
    "Cheese2": 2,
    "Cheese3": 3,
    "Cheese4": 4
}
You can see that the last defined "key": does not have a comma ,, simply because it is the last "key": in the set, and therefore we tell Json that there isn’t anything coming after the Cheese4 "key":.
{
    "Cheese": {
        "Cheddar": 1,
        "Mozzarella": 2,
        "Gouda": 3,
        "Brie": 4,
        "Feta": 5
    }
}
Sequential Mania
Realistically you can mix all the examples together and have as many nested "keys": as you want.
{
    "Cheese1": {
        "Cheddar": {
            "Count": 1,
            "Quality Rating": 5
        },
        "Mozzarella": {
            "Count": 1,
            "Quality Rating": 8
        }
    },
    "Cheese2": {
        "Cheese3": {
            "Cheese4": {
                "Cheese5": {
                    "Count": 9999999
                }
            }
        }
    }
}
It starts to look complicated when you have multiple nested "keys": put together.
Strings in Json
Another kind of value you can assign "keys": is "strings" since "keys": are already technically "strings". A "string" in programming is simply an array [] of characters, a "string" of characters is just a word or a whole sentance.
{
    "Cheese": "Cheese is indeed quite nice",
    "Cheese2": "Should cheese be my only example?"
}
Arrays in Json
You can also assign an array of values to a "key":, meaning that a single "key": can hold multiple values instead of just one.
{
    "Cheese": [
        "This is an array of text",
        "It's simply multiple strings compiled together"
    ]
}
Arrays [] allow a "key": to contain multiple objects {}
{
    "Cheese": [
        {
            "Yellow": "Yes it is in fact very yellow"
        },
        {
            "How Yellow?": [
                "The less yellow the more concerning",
                "But I have seen some people actually like it that way"
            ]
        }
    ]
}
Just like how you need a comma , to tell Json that there is another value in line, you also do it to the curly brackets {} to tell Json that there is another pair coming along.
Booleans in Json
The last piece of information that is needed is true and false statements, or what we call a Boolean. They are simply the word true and false without quotations.
{
    "Cheese": {
        "Is Tasty?": true,
        "Is Healthy?": false
    }
}
Json Formatting
All of the examples above are written in a way that is readable. Json doesn’t need to look like this, as everything can be written onto a single line.
{"Cheese":{"Is Tasty?":true,"Is Healthy?":false},"Mozzarella Notes": ["Even though Mozzarella is good","I still prefer cheddar"]}
Of course this doesn’t look as clean as having everything open, but in many cases this can work because Json allows you to type in both styles in the same document without hindering anything.
{
    "Cheese": {
        "Cheddar": {"Is Good?": true, "Is Healthy?": false},
        "Mozzarella": {"Is Good?": true, "Is Healthy?": false}
    }
}
Escape Characters
In strings, the escape character \ is a normal backslash, but whatever comes directly after it defines what it does. This is what we call an escape sequence.
The most used escape sequence would be \n, which creates a new line.
{
    "text": "Hello, \nWorld!"
}
Output:
Hello,
World!
As you can see, after placing the escape character \, followed by the n, it takes it as an instruction and makes a new line while it doesn’t output the \ or n literally. Though if you want a backslash in your output, you can simply place the escape character \ twice, telling Minecraft to literally print \.
{
    "text": "Hello\\World!"
}
Output:
Hello\World!
There are more escape characters, but I will list the ones that work in Minecraft that I have found so far.
| Escape Sequence | Description |
|---|---|
| \n | Creates a new line in the string |
| \\ | Literally outputs a backslash |
| \” | Literally outputs a quotation |
| \u | Outputs unicode character |
Now that you know a little more about Json, it’s time to start using it practically in Minecraft.
Pack.mcmeta
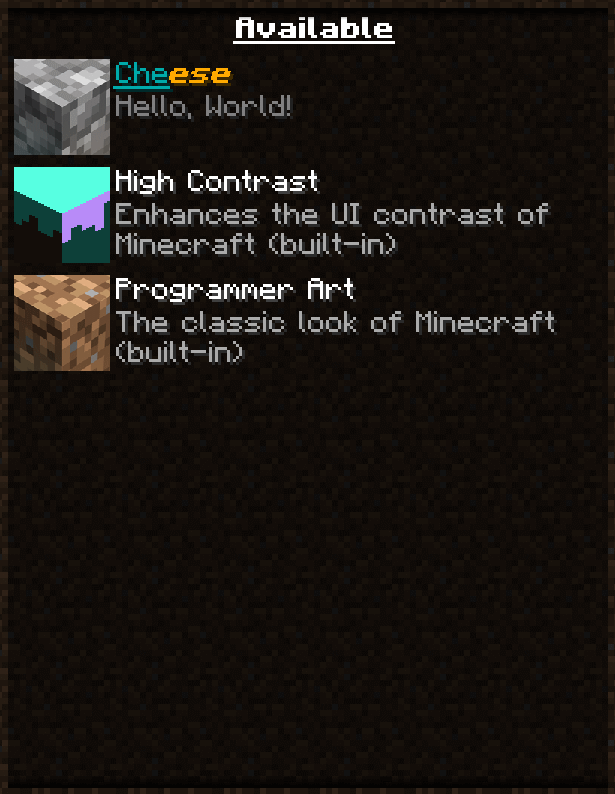
A pack.mcmeta file inside the Cheese folder is what allows minecraft to recognize that the folder is in fact a resourcepack that can be used, else if pack.mcmeta is not in the folder, minecraft will not see the resourcepack.
This is how the game functions with a pre-configured pack.mcmeta file inside the folder:
And this is the resourcepack folder without a valid pack.mcmeta file:

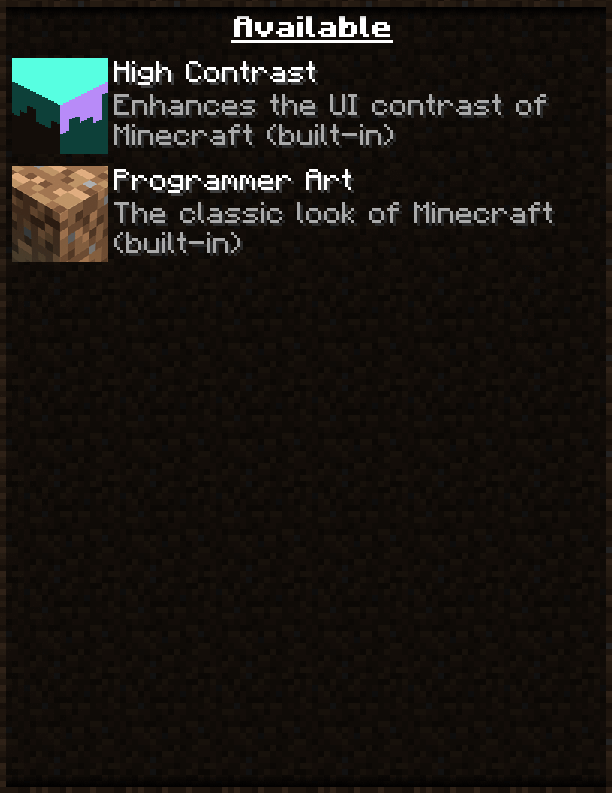
Note that the Resourcepacks folder displayed in the smaller images isn’t the resourcepack, it’s simply the folder that you put your resourcepacks inside from the .minecraft directory.
As you can see, the game doesn’t even display a resourcepack if the pack.mcmeta file isn’t there or the code inside the file isn’t valid. The pack.mcmeta file requires at least the pack_format "key": and the "description": and "object": "keys": for minecraft to recognize the resourcepack.
Now that you understand that the game can’t function without the file, create a new file and call it pack.mcmeta. The .mcmeta is the file extension minecraft uses to give the game’s assets extra information for not only the metadata of the resourcepack but also metadata for textures so that we can specify whether or not the textures can animate.
Once the file is created, edit it with your text editor of choice.
.mcmeta files borrow the syntax from the json language, but minecraft also directly uses .json files for it’s 3D models and blockstates.
This is the minimum requirements pack.mcmeta needs in order for Minecraft to recognize the entire resourcepack.
{
    "pack": {
        "pack_format": 22,
        "description": "Hello, World!"
    }
}
By the very least, you need a pack_format object with a number and a description object with a string. And often times this is all you really need. But now I will show you what all of this means.
pack_format
pack_format determines the version of the resourcepack. Format versions may change depending on the version of minecraft, as it can jump 3 versions in between each title update. Every instance the resourcepack is modified by a snapshot or release version, the required resourcepack version changes. As of 1.20.4, the default version of the resourcepack is version 22, or "pack_format": 22.
{
    "pack": {
        "pack_format": 22
    }
}
If your on the correct version, minecraft won’t display any errors, but if the resourcepack’s version is incorrect, then Minecraft will say Made for an older version of Minecraft, or Made for a newer version of Minecraft.
Correct:

Too Old:

Too new:

supported_formats
The next tag would be "supported_formats". This allows you to not only tell minecraft that the resourcepack functions on a specific version of the game, but it allows you to specify a range of versions the game can recognize as a compatible resourcepack.
There are two ways of doing this. The first way is to specify an array of the range of format versions:
{
    "pack": {
        "supported_formats": [13,22]
    }
}
Format 13 is minecraft 1.19.4’s resourcepack format version, and 22 is the most recent version as of making this video, which is minecraft 1.20.4. Here we have defined that this resourcepack works on versions 1.19.4 (13) through 1.20.4 (22).
Another way you can specify the range is by instead of having an array, you can use objects:
{
    "pack": {
        "supported_formats": {
            "min_inclusive": 13,
            "max_inclusive": 22
        }
    }
}
Either way works, though I suggest using the array as it is easier to remember and type.
description
There are three ways you can use to create a description. The first way is to simply add text into a string contained in the description object:
{
    "pack": {
        "description": "Hello, World!"
    }
}
The resourcepack selection menu allows each resourcepack description to have 2 lines, not just a single line. To write on the second line of the description, you can simple add \n in the text.
{
    "pack": {
        "description": "Hello,\nWorld!"
    }
}
Above you can see \n is inserted in-between "Hello," and "World!". This will cause "Hello," to be on the first line, and "World!" to be on the second.
You are able to add colours and effects to this text by adding unicode escape characters in the raw json string in the description tag.
You can either use the § character. The § is one of the more simple ways of adding colour as the only thing you need to do to add colour is by specifying what comes after it. Here is an example:
{
    "pack": {
        "description": "§3Hello, World!"
    }
}
This sets the text colour to dark_aqua. You can override the colour after you have declared a § by simply adding another § soon after your last §. Here is an example:
{
    "pack": {
        "description": "§3Hello, §fWorld§3!"
    }
}
As you can see this can change the colours quite well. Here is a table of all things you can do with § and unicodes:
§ Code |
Unicode | Colour |
|---|---|---|
| §0 | \u00a70 | black |
| §1 | \u00a71 | dark_blue |
| §2 | \u00a72 | dark_green |
| §3 | \u00a73 | dark_aqua |
| §4 | \u00a74 | dark_red |
| §5 | \u00a75 | dark_purple |
| §6 | \u00a76 | gold |
| §7 | \u00a77 | gray |
| §8 | \u00a78 | dark_gray |
| §9 | \u00a79 | blue |
| §a | \u00a7a | green |
| §b | \u00a7b | aqua |
| §c | \u00a7c | red |
| §d | \u00a7d | light_purple |
| §e | \u00a7e | yellow |
| §f | \u00a7f | white |
§ Code |
Unicode | Style |
|---|---|---|
| §k | \u00a7k | obfuscated |
| §l | \u00a7l | bold |
| §m | \u00a7m | strikethrough |
| §n | \u00a7n | underlined |
| §o | \u00a7o | italic |
| §r | \u00a7r | reset |
The second way is to use unicode escape characters instead of using a §. A unicode escape character may seem more complicated but the pattern will still remain the same:
{
    "pack": {
        "description": "\u00a73Hello, \u00a7fWorld\u00a73!"
    }
}
As complicated as it may look, it’s simply a longer version of a §. Previously we used a \n to create a new line in the json string "Hello, World!". The the backslash \ is called an escape character. This is a way to tell the game that the following text is code rather than simple text. In this case \u00 is used for the character. You could technically type the whole alphabet with the unicode characters but I think it’s better to just type in plain english, or else we might have to look at something as horrifying as this.
{
    "pack": {
        "description": "\u00a73\u0048\u0065\u006C\u006C\u006F\u002c\u0020\u00a7f\u0057\u006F\u0072\u006C\u0064\u00a73\u0021"
    }
}
I’m not too sure why any sane person will do this but if you really really REALLY want to, you can.
It is possible to create an array of strings. By simply using square brackets [] you are capable of creating as many curly brackets {}.
{
    "pack": {
        "description": [
            "Hel",
            "lo, ",
            "Wor",
            "ld!"
        ]
    }
}
Each new string does not create a new line in the resourceopack because there is no \n to tell the program when to create a new line. All this is is doing is putting each string one after the other.
Now as previously mentioned, you are able to create strings that allows you to format the text by adding colours and styles. But there is a far better way in the use of adding an object rather than a single string.
{
    "pack": {
        "description": {
            "text": "Hello, World!",
            "color": "gold",
            "bold": true,
            "italic": true,
            "underlined": true,
            "strikethrough": false,
            "obfuscated": false
        }
    }
}
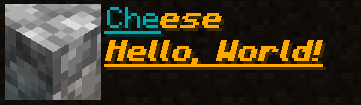
This way of writing does look much better compared to the other examples in terms of readability. As you might notice, the true and false statements do not use quotations.
Like with the unicode escape sequences and the §, I will make a list of all values you can use.
Colours:
    black
    dark_blue
    dark_green
    dark_aqua
    dark_red
    dark_purple
    gold
    gray
    dark_gray
    blue
    green
    aqua
    red
    light_purple
    yellow
    white

Styles:
    bold
    italic
    underlined
    strikethrough
    obfuscated
In more recent versions of Minecraft, you are no longer restricted to using the fixed set of colours, as now you can add in a hex colour value as a string value in the color object.
{
    "pack": {
        "description": {
            "text": "Hello, World!",
            "color": "#ff0000",
            "bold": true,
            "italic": true,
            "underlined": true,
            "strikethrough": false,
            "obfuscated": false
        }
    }
}
In this case, I put in the hex code #ff0000, which is just really really red.
If you want to create more strings without having to retype all of the style and colour values, you can and the extra tag that allows you to create more strings without repeating your styes.
{
    "pack": {
        "description": {
            "text": "Hello, World!",
            "color": "gold",
            "italic": true,
            "underlined": true,
            "extra": [
                {
                    "text": "\nHello, Again!",
                    "color": "dark_red"
                }
            ]
        }
    }
}

With the extra tag in use, you can add additional lines while keeping the previous values while still being able to add more specific values. You can even create nested extra tags by putting extra in every extra. extra fun!
{
    "pack": {
        "description": {
            "text": "Hello, World!",
            "color": "gold",
            "italic": true,
            "underlined": true,
            "extra": [
                {
                    "text": "\nHello, Again!",
                    "color": "dark_red",
                    "extra": [
                        {
                            "text": " More Text!",
                            "color": "dark_aqua"
                        }
                    ]
                }
            ]
        }
    }
}

Alternatively instead of created nested extra tags, you can simply make the description tag an array.
{
    "pack": {
        "description": [
            {
                "text": "#",
                "color": "gold",
                "obfuscated": true
            },
            {
                "text": "Hello, ",
                "color": "white",
                "obfuscated": false
            },
            {
                "text": "World",
                "color": "dark_red",
                "obfuscated": false
            },
            {
                "text": "!",
                "color": "white",
                "obfuscated": false
            },
            {
                "text": "#",
                "color": "gold",
                "obfuscated": true
            }
        ]
    }
}
Like the extra tag, every value here inherits the first declared object. In this example, that would be the # that is gold and has obfuscated set to true. As a result every object after it will also have obfuscated set to true by default. Of course you can set obfuscated to false if need be. This goes for colours as well.
Language (pack.mcmeta)
Minecraft has many uses for the Json format, and one of these uses is languages. It is too early in the document to start modifying or creating languages that Minecraft can recognize.
If you do however have a language you want to modify or create entirely, you would make your language’s existence known by declaring it in pack.mcmeta.
{
    "pack": {
        "pack_format": 22,
        "description": ""
    },
    "language": {
        "en_us": {
            "name": "United States English",
            "region": "United States",
            "bidirectional": false
        }
    }
}
The language key comes after the pack key, and here is where we can add as many languages as we want to modify.
Firstly we have the en_us language already being declared. As it is already in the game, there is not much to do. There are 3 more objects that are additional information for the en_us object. name, region, and bidirectional.
The name of the language can honestly be whatever you want if you were making your own language. region is another key that can be called whatever you want. bidirectional on the other hand is an important value to set. If it is set to true, the language in the game when you select en_us in the language settings of minecraft, all the text you will have to read from right to left. But since English is a language where you read left to right, you can keep bidirectional set to false.
Declaring the en_us language in pack.mcmeta is not needed since it’s already in the game. The real use of the language object is for loading custom language files which can be found in (resourcepack name)/assets/minecraft/lang/.
When we put en_us inside pack.mcmeta, it is looking for the language en_us.json in the lang folder. Later when we start adding custom languages, you can add it to the pack.mcmeta file when it’s in lang.
filter (pack.mcmeta)
As of Minecraft 1.19, you can filter content in both resourcepacks and datapacks. This simply means that if you wanted to prevent certain resources from loading, you can specify them inside pack.mcmeta within an array [].
For an example, if you wanted to remove a crafting recipe from the game in a datapack, you may specify it in the filter key. For resourcepacks, you can prevent certain textures from loading or even certain .mcmeta files or block models from loading either from your resourcepack or from the content in minecraft’s resources.
Here is an example:
{
    "filter": {

    }
}
This is an empty filter key. Since the key opens up to an object {}, you can only input a single entry.
With this, let’s prevent minecraft’s default stone texture to load by listing it within and object {}.
{
    "filter": {
        "block": [
            {
                "path": "block/stone.png"
            }
        ]
    }
}
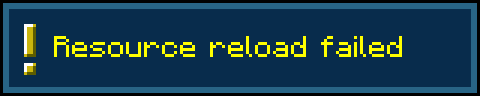
Here Minecraft’s default stone texture has been specified. Now when the resourcepack has reloaded, it will prevent stone.png from loading across all loaded resourcepacks and Minecraft’s loaded resources.
This will apply to any model that requires the texture.
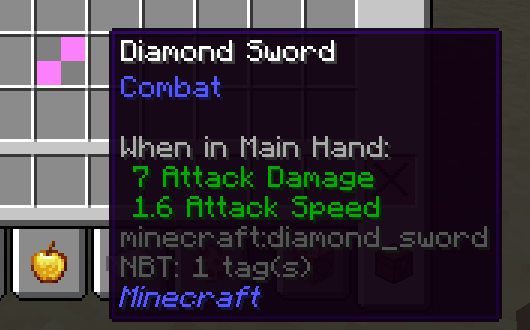
This can also work for item textures by specifying item/ instead of block/.
"filter": {
        "block": [
            {
                "path": "item/diamond_sword.png"
            }
        ]
    }
Since we specified textures, now what happens when we specify the block models?
Models in minecraft end in the .json file format which will be covered at a later point.
{
    "filter": {
        "block": [
            {
                "path": "block/stone.json"
            }
        ]
    }
}

Here you can see that we prevented the block model for stone to load, not the texture since we specified stone.json rather than stone.png.
We can prevent both the texture and model from loading entirely by placing an asterisk *.
{
    "filter": {
        "block": [
            {
                "path": "block/stone.*"
            }
        ]
    }
}
With the asterisk * being placed after the period ., we are telling the game to filter every file format that has the name stone before it.
If you try to place an asterisk * in the filter without being careful, you could accidentally prevent every minecraft resource for models textures and animations from being loaded, which results in Minecraft disabling your resourcepack.
{
    "filter": {
        "block": [
            {
                "path": "block/*"
            }
        ]
    }
}
So be careful.
Since you can block any resource in a resourcepack, I thought it would be fun to show that you can block animation files from loading.
{
    "filter": {
        "block": [
            {
                "path": "block/fire_0.png.mcmeta"
            }
        ]
    }
}
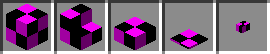
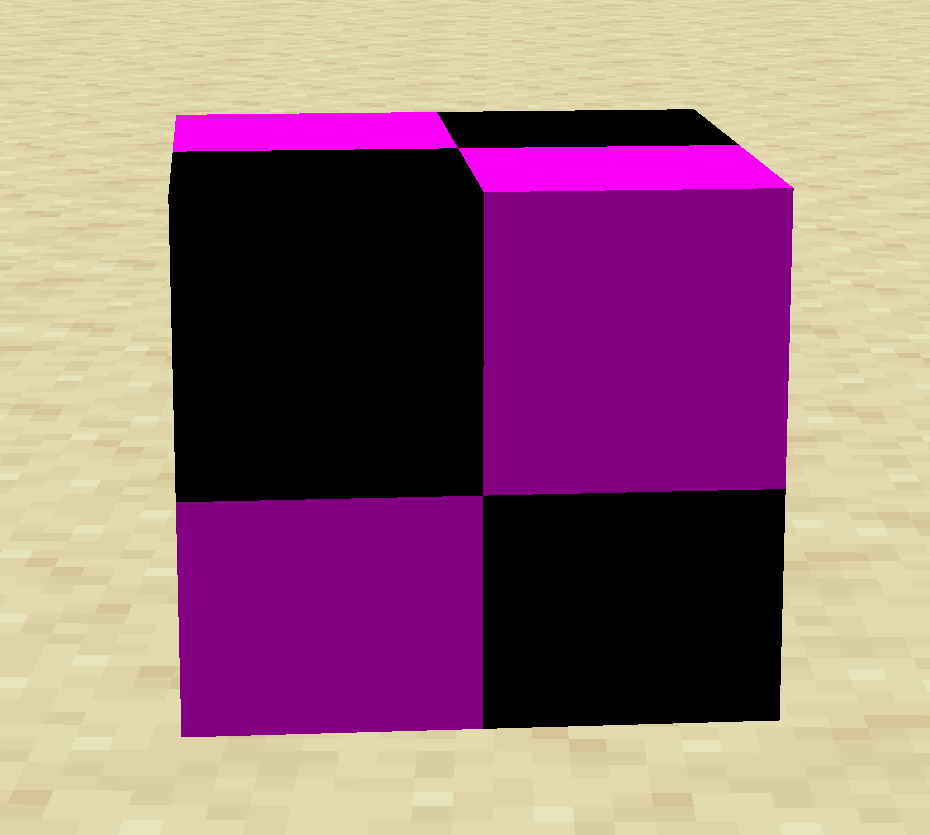
You can see that the .mcmeta file tells minecraft that fire_0.png is the animation file, and here we are preventing it from loading.
This is without the filter:
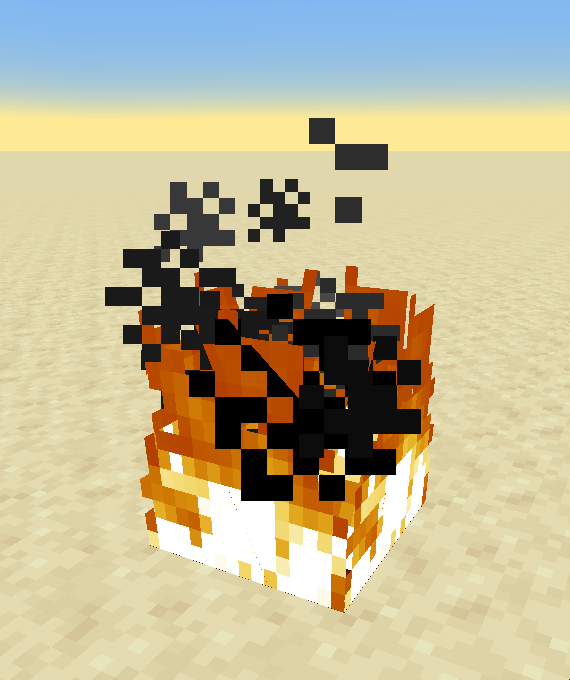
And this is with the filter:
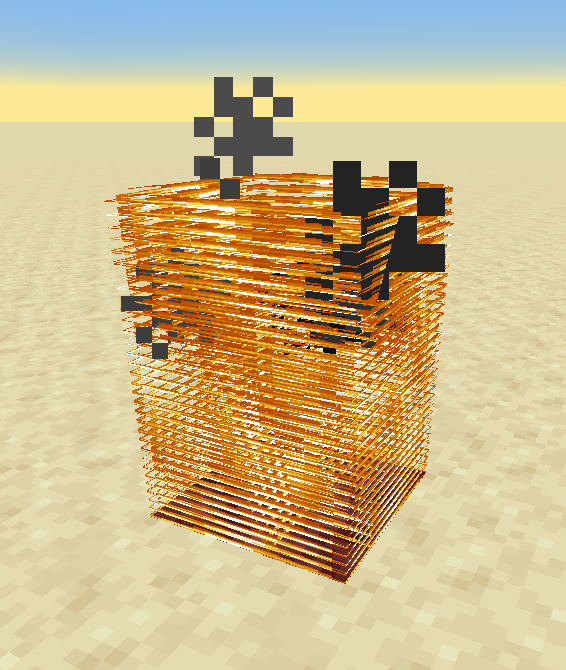
Here you can see the entire animation strip being squished into the dimensions of the UV Map of fire.
Of course you can specify multiple items to prevent from being loaded.
{
    "filter": {
        "block": [
            {
                "path": "block/fire_0.png.mcmeta"
            },
            {
                "path": "block/stone.png"
            },
            {
                "path": "item/diamond_sword.png"
            }
        ]
    }
}
Another element you can add to the block key inside the filter key is the namespace key.
As you know, in order to prevent a resource from loading, you need to specify the path key. You can also specify the namespace of which resource to block specifically.
By default, if there is only the path key inside the block array [], everything specified by the path key will be blocked. This means that it would prevent stone.png from loading across every resourcepack loaded. If you only wanted to block a specific texture in a specific namespace, you can specify it here.